DIY home décor has become a popular trend among creative minds who want to turn their house into a unique and stylish place. Upcycling and repurposing are two techniques that can help you achieve this goal.
Upcycling is the practice of taking discarded items that can no longer be used in their current form and transforming them into something more useful with original and improved qualities.
Repurposing involves taking an existing item and using it for something other than its original intended purpose. This could include using the item in a new, creative way or changing it to give it a completely different look.
There are many great reasons to try your hand at upcycling and repurposing projects when it comes to DIY home décor. First, these types of projects tend to be relatively affordable. Secondly, they allow you to create something unique and personal, as you can make choices that fit your own style and taste. Thirdly, upcycling and repurposing projects are environmentally friendly. By reusing old materials instead of buying new ones, you’re helping to reduce waste in landfills and prevent the overuse of resources.
Ready to get started? Read on to learn about four of the most popular DIY home décor projects that involve upcycling and repurposing!
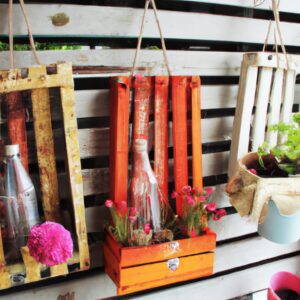
DIY Home Décor: Upcycling and Repurposing Projects
Upcycling and repurposing projects are a great way to add a personal touch to your home. Not only are these projects cost-effective, they’re also a fun and creative way to spruce up your living space. Plus, upcycling and repurposing projects don’t take much time or experience to accomplish. All you need is the right materials and tools and you can easily get started!
Project 1: Upcycle Your Old Chair
One of the easiest and most rewarding upcycling projects is to give an outdated chair a modern upgrade. Whether you choose to repaint the frame or reupholster the seat, this simple project will make a big difference in the overall atmosphere of your home.
Materials:
- Old chair
- Paint (optional)
- Fabric (optional)
- Staple gun (optional)
Tools:
- Sandpaper
- Paintbrush
- Scissors
- Measuring tape
Cost: This project should cost no more than $50, depending on the materials you choose.
Instructions: Begin by sanding down the frame of the chair to remove any existing paint or varnish. If you plan to repaint the frame, apply your desired colour with a brush and allow it to dry completely. If reupholstering the seat, lay out your desired fabric and cut it to size according to the measurements of the seat. Use a staple gun to secure the fabric to the bottom of the chair.
Once finished, you should have a beautiful, one-of-a-kind piece of furniture in your home!
Project 2: Upcycling and Repurposing a Nightstand
Upcycling and repurposing old furniture items is a great way to bring a modern and unique touch to your home décor. A nightstand is the perfect project piece for upcycling and repurposing, as it is usually quite simple to find second-hand nightstands and from there you can get creative and transform them into something truly unique.
For this project, you will need the following materials:
- A second-hand nightstand
- Wood filler and primer
- Paint or stain of your choice
- Paint brushes
- Sandpaper
- Screwdriver
The cost of this project will depend on where you source your materials, however, second-hand nightstands are often inexpensive and the other materials should be relatively inexpensive too. Depending on the design you choose, this project can also be completed fairly quickly.
To start with you’ll need to remove all the hardware from the nightstand. Once the hardware is removed you’ll want to use sandpaper to lightly sand the entire surface. This will help the primer and paint to stick to the piece better and last longer.
After sanding, fill any holes or cracks with wood filler then brush a coat of primer onto the piece. Allow it to dry completely before you begin painting. Once the primer is dry, you can start painting your masterpiece! Pick any color or stain you like to give the piece a unique look. Enjoy the creative process of bringing an old piece of furniture back to life!
When the paint is dry you can add new hardware to the piece. Use a screwdriver to attach the new handles and you’re finished! You now have a beautiful one-of-a-kind nightstand that adds character and style to your home décor.
Congratulations, you have just upcycled and repurposed a nightstand! With some creativity and time, upcycling and repurposing old furniture is an easy and fun way to give your home a modern, custom décor.
Project 3: Upcycling an Old Chair
If you have an old chair lying around that could use some sprucing up, adding a bit of paint and fabric can give it a new life. With just a few inexpensive supplies, you can turn that old chair into something special! Here’s what you’ll need:
- Paint (the type and color of your choice)
- Fabric in a complementary color or pattern
- Sandpaper
- Paintbrush
- Staple gun
- Foam padding (optional)
To begin, you’ll want to sand down the chair so that the paint will adhere better. Once it’s been sanded, clean off any dust with a damp cloth. Now it’s time to paint! Choose whatever type of paint you like – latex, oil-based, spray paint, etc. – and make sure to let the paint dry completely before proceeding to the next step.
Next, measure how much fabric you’ll need to cover the chair and cut to size. You may want to add some foam padding for extra comfort. Once you have the right measurements, place the fabric on the chair and secure with a staple gun. For a nice finishing touch, you can consider adding decorative buttons or tassels.
And that’s it! You now have a one-of-a-kind chair that you created yourself. Upcycling and repurposing can be a great way to spruce up your home décor in a creative and cost-effective way. Best of all, you and your family can proudly show off your hard work!
Project 4: Repurposing Old Shelves
Upcycling doesn’t have to cost a lot of money and you can use items that you already have in your home. Repurposing old shelves is one of the easiest projects that you can do. All you need is some paint and a few supplies and you can make your old shelves look like new.
To get started, you’ll need to gather the necessary materials. This includes paint, brushes, paint stripper, sandpaper, and any other supplies needed for the project. Make sure to choose the right type of paint for the material you are working with. You’ll also need to decide whether you want a glossy or matte finish to give your shelf a more modern look.
Once you have gathered the materials, the next step is to strip the existing paint off the shelf. Use a paint stripper to remove the old layer of paint and then sand down the surface using sandpaper. This will help you get a smooth surface that you can paint on easily.
Once your shelves are ready, it’s time to start painting! Use light coats of paint, starting from the edges and going inwards. You can use a brush or roller depending on the size of the shelves and the type of finish you’re looking for. Don’t forget to let each coat dry before applying the next one.
Once the paint has dried, you can now add any decorative elements like wallpaper or fabric. For a more personalised touch, you can also attach knobs, handles, or other pieces to the shelf to make it more unique. Finally, seal the paint with a clear sealer to protect it from scratches and dust.
Repurposing old shelves is a great way to give new life to old furniture and make it look like new. With just a few materials and tools, you can create a beautiful piece of furniture that will be sure to add a touch of personality to your home décor.
Benefits of Upcycling and Repurposing Projects
Upcycling and repurposing projects provide many benefits to homeowners, not only in terms of the environmental sustainability of their home décor, but also in terms of cost savings. Reusing materials like wood, fabric, paper, and metal can help reduce landfill waste, conserve energy, and decrease the amount of resources used in the production of new products.
These projects require minimal supplies and often little to no experience in DIY home decorating. By repurposing or upcycling items, you can give a space in your home a unique and personal touch. More importantly, upcycling and repurposing projects can save you money since most of the materials used come from things that are already around the house. This can help to make larger decorating projects more affordable.
Furthermore, these projects often result in truly one-of-a-kind creations and they can be turned into a fun activity for the whole family to enjoy. Upcycling projects can also make irreversible mistakes much easier to deal with – if something doesn’t turn out as planned, you can simply start again with another item!
Answering Your Questions and Concerns about Upcycling and Repurposing
If you’re new to upcycling and repurposing, chances are you have some questions and concerns. That’s totally natural! With a bit of information and research, however, you can be confident in taking the plunge.
First and foremost, it is important to consider the safety of any project. Some materials or tools may require special attention when handling, such as wearing gloves or long sleeves. Be sure to read up on instructions for each material and tool that you choose to work with.
It is also important to consider your budget. For some projects, you may need to buy a few items which can add up. Alternatively, some items can be found or scavenged for free! Check out classified ads, garage sales, or even your own home to see what you can reuse or repurpose.
Finally, don’t forget to have fun! Upcycling and repurposing projects can be a great way to let your creativity shine, so take it easy and enjoy the process. Do some research on different types of DIY projects and make sure to consider the size and complexity of the project before getting started.
The options are endless when it comes to upcycling and repurposing, so choose a project that fits your lifestyle and needs. Keep exploring new ideas and you will be surprised at how quickly you become an expert!
comments: 0